UI
UI设置思路
准备工作
- 在Project窗口中创建重要文件夹:
- Resources
- Scripts
- StreamingAssets:用于存放json数据文件
- ArtRes
- 创建UGUI对象,设置Canvas(可以把EventSystem和用于渲染UI的摄像机作为Canvas的子对象,防止被删除)
- 设置渲染模式,关联UI摄像机(只渲染UI层,Depth Only,移除音效组件)
- 修改主摄像机参数(取消渲染UI层)
- Canvas设置分辨率自适应(缩放模式)
- 分辨率根据美术的sprite图来设置,没有就是1920x1080
- 分析是竖屏游戏还是横屏游戏,横屏高不变,分辨率自适应来Match高
面板基类
假设我们的面板都需要实现显示、隐藏自己、淡入淡出的功能。我们可以用一个面板基类来控制。
1
2
3
4
5
6
7
8
9
10
11
12
13
14
15
16
17
18
19
20
21
22
23
24
25
26
27
28
29
30
31
32
33
34
35
36
37
38
39
40
41
42
43
44
45
46
47
48
49
50
51
52
53
54
55
56
57
58
59
60
61
62
63
64
65
66
67
68
| using UnityEngine.Events;
public abstract class BasePanel : MonoBehaviour
{
private CanvasGroup canvasGroup;
private float alphaSpead = 10;
private bool isShow;
private UnityAction hideCallBack;
protect virtual void Awake()
{
canvasGroup = this.GetComponent<CanvasGroup>();
if(canvasGroup == null)
canvasGroup = this.gameObject.AddComponent<CanvasGroup>();
}
protect virtual void Start()
{
Init();
}
public abstract void Init();
public virtual void ShowMe()
{
isShow = true;
canvasGroup.alpha = 0;
}
public virtual void HideMe(UnityAction callBack)
{
isShow = false;
canvasGroup.alpha = 1;
hideCallBack = callBack;
}
void Update()
{
if(isShow && canvasGroup.alpha != 1)
{
canvasGroup.alpha += alphaSpeed * Time.deltaTime;
if(canvasGroup.alpha >= 1)
canvasGroup.alpha = 1;
}
else if(!isShow)
{
canvasGroup.alpha -= alphaSpeed * Time.deltaTime;
if(canvasGroup.alpha <= 0)
{
canvasGroup.alpha = 0;
hideCallBack?.Invoke();
}
}
}
}
|
UI管理器
因为UGUI制作的面板都是动态的创建和删除的,所以我们可以用一个UI管理器来整体管理面板的显示、隐藏、获取。
1
2
3
4
5
6
7
8
9
10
11
12
13
14
15
16
17
18
19
20
21
22
23
24
25
26
27
28
29
30
31
32
33
34
35
36
37
38
39
40
41
42
43
44
45
46
47
48
49
50
51
52
53
54
55
56
57
58
59
60
61
62
63
64
65
66
67
68
69
70
71
72
73
74
75
76
77
78
79
80
81
82
83
| public class UIManager
{
private static UIManager instance = new UIManager();
public static UIManager Instance => instance;
private Dictionary<string, BasePanel> panelDic = new Dictionary<string, BasePanel>();
private Transform canvasTrans;
private UIManager()
{
canvasTrans = GameObject.Find("Canvas").transform;
GameObject.DontDestroyOnLoad(canvasTrans.gameObject);
}
public T ShowPanel<T>() where T:BasePanel
{
string panelName = typeof(T).Name;
if(panelDic.ContainsKey(panelName))
return panelDic[panelName] as T;
GameObject panelObj = GameObject.Instantiate(Resources.Load<GameObject>("UI/" + canvasTrans));
panelObj.transform.SetParent(canvasTrans, false);
T panel = panelObj.GetComponent<T>();
panelDic.Add(panelName, panel);
panel.ShowMe();
return panel;
}
public void HidePanel<T>(bool isFade = true) where T:BasePanel
{
string panelName = typeof(T).Name;
if(panelDic.ContainsKey(panelName))
{
if(isFade)
{
panelDic[panelName].HideMe(() =>
{
GameObject.Destroy(panelDic[panelName].gameObject);
panelDic.Remove(panelName)
});
}
else
{
GameObject.Destroy(panelDic[panelName].gameObject);
panelDic.Remove(panelName)
}
}
}
public T GetPanel<T>() where T:BasePanel
{
string panelName = typeof(T).Name;
if(panelDic.ContainsKey(panelName))
return panelDic[panelName] as T;
return null;
}
}
|
注意:使用这种方式必须保证类名和预设体名字一致
面板实例
有了上述的面板基类和UI管理器,我们可以正式来实现面板逻辑了。以下以一个提示面板作为示例:
1
2
3
4
5
6
7
8
9
10
11
12
13
14
15
16
17
18
19
20
21
22
23
24
| using UnityEngine.UI;
public class TipPanel : BasePanel
{
public Button btnSure;
public Text txtInfo;
public override void Init()
{
btnSure.onClick.AddListener(() => {
UIManager.Instance.HidePanel<TipPanel>();
});
}
public void ChangeInfo(string info)
{
txtInfo.text = info;
}
}
|
另外,由于我们的代码没有入口,还需要写一个Main函数,之后我们只需要创建一个空物体取名为Main,再将此脚本拖上去,UI面板就都可以显示了。
1
2
3
4
5
6
7
8
9
| public class Main : MonoBehaviour
{
void Start()
{
TipPanel tipPanel = UIManager.Instance.ShowPanel<TipPanel>();
}
}
|
特殊部件
蓄能条
蓄能条的表现形式是长按蓄能,我们可以通过UGUI里的长按监听事件来完成。
其中,这里的实现思路是,GamePanel上有一个长按按钮,通过长按它来使GamePanel上的蓄能条改变,为了更好的体现面向对象的思路,我们可以这样操作:
- 按钮单独处理抬起、按下逻辑
- 按钮中有抬起、按下的事件装载了抬起、按下要实现的具体逻辑
- 在
GamePanel中实现这里面的具体逻辑
下面是处理长按按钮的逻辑:
1
2
3
4
5
6
7
8
9
10
11
12
13
14
15
16
17
18
19
20
21
| using UnityEngine.Events;
using UnityEngine.EventSystems;
public class LongPress : MonoBehaviour, IPointerDownHandler, IPointerUpHandler
{
public event UnityAction upEvent;
public event UnityAction downEvent;
public void OnPointerDown(PointEventData eventData)
{
downEvent?.Invoke();
}
public void OnPointerDown(PointEventData eventData)
{
upEvent?.Invoke();
}
}
|
然后再GamePanel脚本上处理具体逻辑:
1
2
3
4
5
6
7
8
9
10
11
12
13
14
15
16
17
18
19
20
21
22
23
24
25
26
27
28
29
30
31
32
33
34
35
36
37
38
39
40
41
42
43
44
45
46
47
48
49
50
51
52
53
54
55
56
57
58
59
|
public LongPress longPress;
public GameObject imgRoot;
public RectTransform imgBk;
public void Start()
{
longPress.downEvent += BtnDown;
longPress.upEvent += BtnUp;
imgRoot.gameObject.SetActive(false);
}
private bool isDown = false;
private float nowTime = 0;
public float addSpeed = 10;
private void BtnDown()
{
isDown = true;
nowTime = 0;
imgBk.sizeDelta = new Vector2(0, 40);
}
private void BtnUp()
{
isDown = false;
imgRoot.gameObject.SetActive(false);
}
private void Update()
{
if(isDown)
{
nowTime += Time.deltaTime;
if( nowTime >= 0.2f)
{
imgRoot.gameObject.SetActive(true);
imgBk.sizeDelta += new Vector2(imgBk.sizeDelta * Time.deltaTime, 0);
if( imgBk.sizeDelta.x >= 800 )
{
imgBk.sizeDelta = new Vector2(0, 40);
}
}
}
}
|
进度条
有两种情况可以做进度条。
- 有美术资源(不易被拉伸)—— Image改为填充模式
- 无美术资源 —— 按住shift键左对齐,改变宽
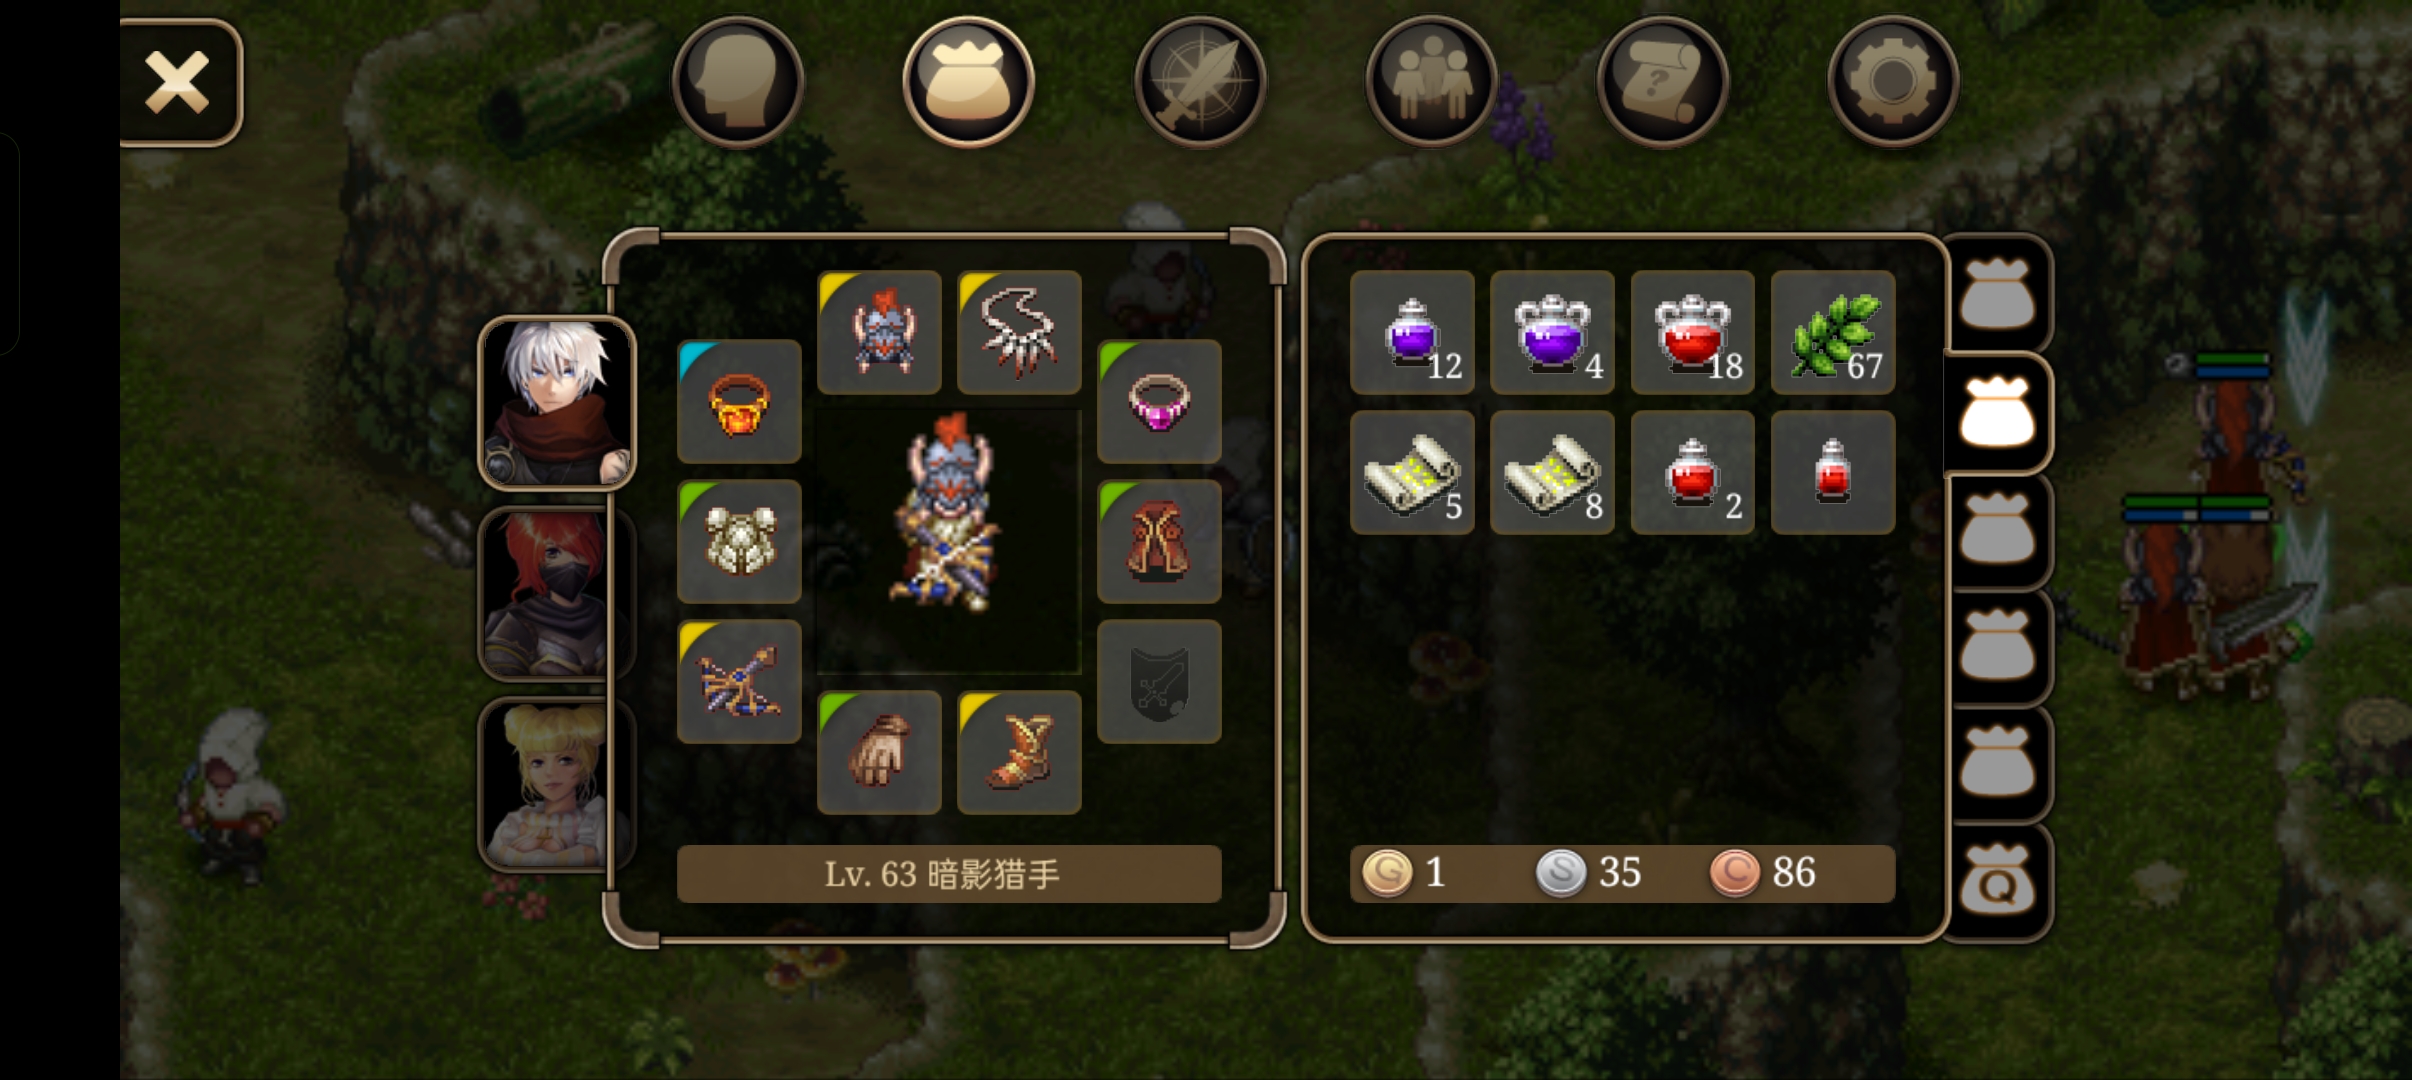
背包
接下来用UGUI中的滚动视图来制作背包的储存格子。
1
2
3
4
5
6
7
8
9
10
11
12
13
14
15
16
17
18
19
20
21
22
23
24
25
26
27
28
29
30
31
32
33
34
35
36
37
38
39
| using UnityEngine.UI;
public class BagPanel : MonoBehaviour
{
public static BagPanel panel;
public Button btnClose;
public ScrollRect svItems;
private void Awake()
{
panel = this;
}
void Start()
{
for(int i = 0; i < 30; i ++)
{
GameObject item = Instantiate(Resources.Load<GameObject>("Item"));
item.transform.SetParent(svItems.content, false);
item.transform.localPosition = new Vector3(10, -10, 0) + new Vector3(i % 4 * 160 , -i / 4 * 160, 0);
}
svItem.content.sizeDelta = new Vector2(0, Mathf.CeilToInt(30 / 4f) * 160);
btnClose.onClick.AddListener(() => {
gameObject.SetActive(false);
});
this.gameObject.SetActive(false);
}
}
|
摇杆
整个功能分为两步:
- UI界面摇杆的控制(向量、
EventTrigger)
- 摇杆移动带动玩家移动的具体逻辑(四元数)
我们先来实现第一步:
- 先为摇杆子对象添加
EventTrigger
1
2
3
4
5
6
7
8
9
10
11
12
13
14
15
16
17
18
19
20
21
22
23
24
25
26
27
28
29
30
31
32
33
34
35
36
37
38
39
40
41
42
43
44
45
46
47
48
49
50
51
52
53
54
55
56
| using Unity.EventSystems;
public class GamePanel : MonoBehaviour
{
public RectTransform imgJoy;
public EventTrigger et;
}
void Start()
{
EventTrigger.Entry en = new EventTrigger.Entry();
en.eventID = EventTriggerType.Drag;
en.callback.AddListener(JoyDrag);
et.triggers.Add(en);
EventTrigger.Entry en = new EventTrigger.Entry();
en.eventID = EventTriggerType.EndDrag;
en.callback.AddListener(EndJoyDrag);
et.triggers.Add(en);
}
private void JoyDrag(BaseEventData data)
{
PointerEventData eventData = data as PointerEventData;
Vector2 nowPos;
RectTransformUtility.ScreenPointToLocalPointInRectangle(
imgJoy.parent as RectTransform,
eventData.position,
eventData.enterEventCamera,
out nowPos );
imgJoy.localPosition = nowPos;
if(imgJoy.anchoredPosition.magnitude > 170)
{
imgJoy.anchoredPosision = imgJoy.anchoredPosition.normalized * 170;
}
player.Move(imgJoy.anchoredPosition);
}
private void EndJoyDrag(BaseEventData data)
{
imgJoy.anchoredPosition = Vector2.zero;
player.Move(Vector2.zero);
}
|
再处理控制玩家移动相关逻辑:
在PlayerObject的脚本上:
1
2
3
4
5
6
7
8
9
10
11
12
13
14
15
16
17
18
19
20
21
22
23
24
25
26
27
| public class PlayerObject : MonoBehaviour
{
public float moveSpeed = 10;
public float roundSpeed = 40;
private Vector3 nowMoveDir = Vector3.zero;
public void Move(Vector2 dir)
{
nowMoveDir.x = dir.x;
nowMoveDir.y = 0;
nowMoveDir.z = dir.y;
}
void Update()
{
if(nowMoveDir != Vector3.zero)
{
this.transform.Translate(Vwctor3.forward * moveSpeed * Time.deltaTime);
this.transform.rotation = Quaternion.Slerp(this.transform.rotation, Quaternion.LookRotation(nowMoveDir), roundSpeed * Time.deltaTime);
}
}
}
|
UI Toolkit 和 UI Builder 是 Unity 中新一代的 UI 开发工具链 —— 简单来说,UI Toolkit 是底层框架,UI Builder 是可视化编辑器,二者配合替代了传统的 UGUI,尤其适合做编辑器扩展和游戏内 UI。
接下来,我将简单的介绍UI Toolkit 和 UI Builder 的使用方法(以下实例是编辑器扩展相关功能):
在Asset文件夹下创建一个Editor文件夹(只在编辑器模式下有,不被打包)
再在Editor文件夹下创建一个UI Builder文件夹,这时就可以创建UI Toolkit - Editor Window
这时,里面就会有3个可以打开的文件:
比较常用的是C#。
接着,在Assets/Editor/UI Builder/Item Editor(Visual Tree Asset)文件下,双击就可以打开编辑窗口。这个窗口相当于是Unity内置的一个编辑器,接下来介绍基础的使用方法。
- 将Library中的Visual Element当作一个空物体使用,拖入Hierarchy窗口。(在右侧的Inspector窗口中可以修改命名,拉伸方式等)
- Viewport中将想修改的地方选中,可以根据名字旁边的符号查看他的样式,符号的意思分别是:排列方向,对其方式(3种)
主玩家相关
人物移动
- 2D横板平台跳跃:
AddForce添加一个力
- 伪Y轴游戏:移动坐标。
关键代码如下:
1
2
3
4
5
| private void Movement()
{
rb.MovePosition(rb.position + movementInput * speed * Time.deltaTime);
}
|
其中,rb是RigidBody2D组件,调用了内置方法MovePosition,参数传最开始的位置 + 输入方向 * 速度 * 帧间隔时间。
并且,这个函数因为用到了物理系统,必须在FixedUpdate() 中调用,它会在下一个物理步长中平滑地将刚体移动到目标位置并且自动处理碰撞逻辑。
边界判断及摄像机跟随
有些游戏会涉及到有关玩家的移动,这时候可能会因为玩家移动或者分辨率的原因使玩家不能保持在屏幕内,这时需要处理一定的游戏逻辑来控制主玩家在屏幕范围内。
思路如下:

记录玩家之前的位置和玩家现在的位置,判断玩家当前的位置,如果当前位置超出了屏幕范围,则把玩家位置拉回之前的位置。
示例如下:
1
2
3
4
5
6
7
8
9
10
11
12
13
14
15
16
17
18
19
20
21
22
23
24
25
26
27
|
private Vector3 nowPos;
private Vector3 frontPos;
void Update()
{
frontPos = this.transform.position;
nowPos = Camera.main.WorldToScreen(this.transform.position);
if(nowPos.x <= 0 || nowPos.x >= Screen.width)
{
this.transform.position = new Vector3(frontPos.x, this.transform.position.y, this.transform.position.z);
}
if(nowPos.y <= 0 || nowPos.y >= Screen.height)
{
this.transform.position = new Vector3(this.transform.position.x, this.transform.position.y, frontPos.z);
}
}
|
另外,如果人物移动时希望摄像机跟随,直接在Windows -> Package Manager搜索Cinemachine安装。再创建一个Cinemachine,选择2D Camera,设置它的Follow和Look At对象。
限制摄像机范围的时候,需要在Cinaemachine VirtualCamera这个组件中的Add Extension中选择Cinemachine Confiner,此时会自动添加两个脚本。
我们的游戏可能采用多个场景,我们需要给这些场景都设置碰撞边界:为一个场景创建空物体命名为Bounds,为其添加Polygon Collider 2D编辑区域,并设置Points的四个角使其为整数点,勾选Is Trigger。
不过,我们现在又面临另一个问题:不同场景中的物体不能相互关联,也就是说Bounds物体没有办法与Cinemachine Confiner关联,这时我们就可以通过代码控制每一次加载场景时,通过代码在场景加载好之前将二者关联。以下是实现思路:
1
2
3
4
5
6
7
8
9
10
11
12
13
14
15
16
17
| using Cinemachine;
using UnityEngine;
public class SwitchBounds : MonoBehaviour
{
private void Start()
{ SwitchConfinerShape();
} private void SwitchConfinerShape()
{
PolygonCollider2D confinerShape = GameObject.FindGameObjectWithTag("BoundsConfiner").GetComponent<PolygonCollider2D>();
CinemachineConfiner confiner = GetComponent<CinemachineConfiner>();
confiner.m_BoundingShape2D = confinerShape;
confiner.InvalidatePathCache();
}}
|
跑步与走路切换(融合树实现)
要实现按下Shift键从走路切换到跑步,抬起时从跑步切换到走路。
1
2
3
4
5
6
7
8
9
10
11
12
13
14
15
16
17
18
19
| public calss Test : MonoBehaviour
{
private float dValue = 0.5f;
void Start()
{
animator = this.GetComponent<Animator>();
}
void Update()
{
animator.SetFloat("Speed", Input.GetAxis("Vertical") * dValue);
if(Input.GetKeyDown(KeyCode.LeftShift))
dValue = 1;
if(Input.GetKeyUp(KeyCode.LeftShift))
dValue = 0.5f;
}
}
|
控制角色部分旋转
思路:人物本来就在不停移动,在这个过程中,人物会一直看向一个点。在头部加上一个空对象,指向看向的点,当这个向量旋转时就会得到一个新的点,从而使人物部分旋转
![[Pasted image 20251208204210.png]]
1
2
3
4
5
6
7
8
9
10
11
12
13
14
15
16
17
18
19
20
21
22
23
24
25
26
27
28
29
| public class Test : MonoBehaviour
{
private Animator animator;
public Transform headPos;
private float chageAngleX;
void Start()
{
animator = this.GetComponent<Animator>();
}
void Update()
{
animator.SetFloat("x", Input.GetAxis("Horizontal"));
animator.SetFloat("y", Input.GetAxis("Vertical"));
chageAngleX += Input.GetAxis("Mouse X");
changeAngleX = Mathf.Clamp(changeAngleX, -30, 30);
}
private void OnAnimatorIK(int layerIndex)
{
animator.SetLookAtWeight(1, 1, 1);
Vector3 pos = Quaternion.AngleAxis(changeAgleX, Vector3.up) * (headPos.position + headPos.forward * 10);
animator.SetLookAtPosition(pos);
}
}
|
地图
2D层级显示
当做有伪”z”轴的2D游戏时,需要调整各层的显示。
首先,将Edit-Project Setting-Graphics中的渲染模式改为Custom Axis,排序轴改为X 0 Y 1 Z 0
- 地板与人物:人物一直显示在地板上方。
- 地板的
Sprite Renderer的Layer始终低于人物的Sprite Renderer的Layer。
- 墙体与人物:人物一直在后方墙体之前,前方墙体之后。
- 后方墙体:和地板设置为同一层
- 前方墙体:新建一个
Tilemap渲染层,把它的Layer设置到人物的Layer之上
- 植物与人物:人物从后方经过植物时会被挡住,从前方经过植物时会挡住植物。
景观物体相关
半透明效果
在游戏中,当我们的人物经过一个景观物体后面时,为了让表现效果更好,我们通常采用使前方的景观物体变成半透明来处理,下面是实现半透明效果的操作流程。
首先,我们要得到该景观物体上的SpriteRenderer。
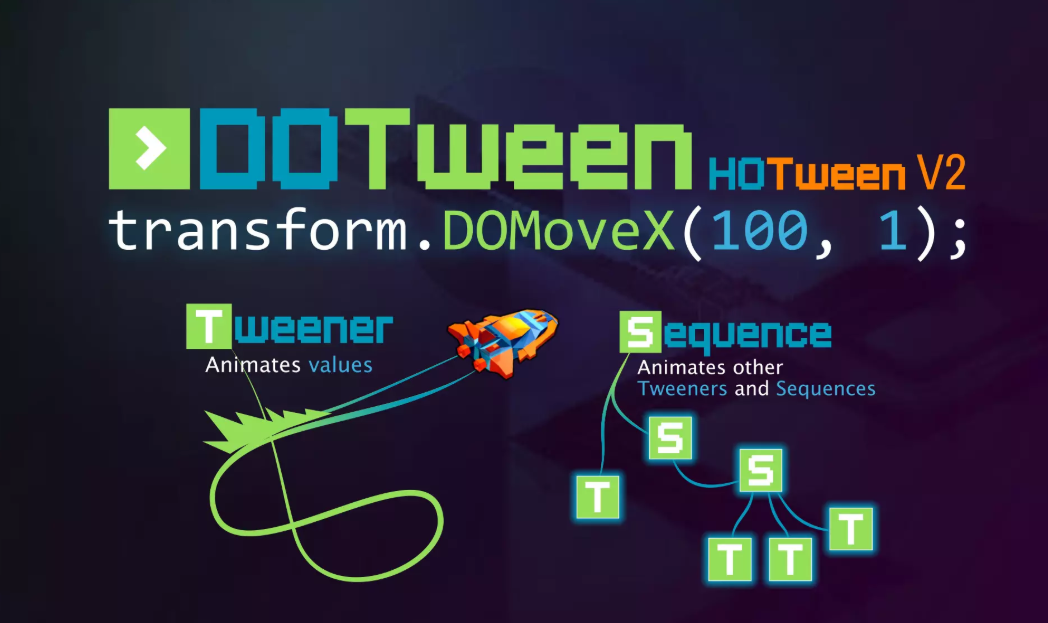
接下来,会使用一个常用来做动画的工具——DoTween
在Unity Asset Store下载DoTween,点击SetUP,Apply。
接着我们就能实现这个效果了,核心思路就是:当人物触发碰撞器时,改变alpha通道的值来实现半透明。
1
2
3
4
5
6
7
8
9
10
11
12
13
14
15
16
17
18
19
20
21
22
23
24
25
26
27
28
| using UnityEngine;
using DG.Tweening;
[RequireComponent(typeof(SpriteRenderer))]
public class ItemFader : MonoBehaviour
{
private SpriteRenderer spriteRenderer;
private void Awake()
{
spriteRenderer = GetComponent<SpriteRenderer>();
}
public void FadeIn()
{
Color targetColor = new Color(1, 1, 1, 1);
spriteRenderer.DOColor(targetColor, 0.35f);
}
public void FadeOut()
{
Color targetColor = new Color(1, 1, 1, 0.45f);
spriteRenderer.DOColor(targetColor, 0.35f);
}
}
|